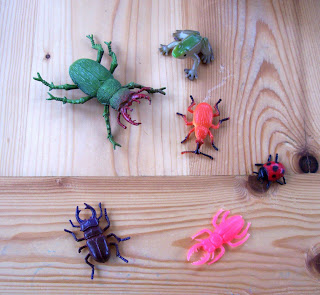
I have two boys mad about bugs, dinosaurs and anything that inhabits rivers or oceans, they spend most of their time drawing bugs, talking about bugs, watching bugs on tv, ok so lets just say these two boys know their bugs. When clay is out bugs are usually whats made so I thought I'd take it a step further so they can make more bugs quicker and in a different way; so we set about making plaster push moulds with their favourite toy bugs.
This is how we did it.....
 |
simplest shapes with less edges to undercut. |
 |
| I used clay to fill in the undercuts so frog would be easier to release from the mould and so the plaster doesnt trap under it. |
 |
| De-moulded from the conatiner, now the clay needs to be picked away carefully as the mould is still wet & quite fragile. |
| Here you can see the bug shapes appearing, as the mould is still wet I will let the rest of the clay dry so not to disturb the mould. Let mould dry out before cleaning and taking a cast. |
 |
| When the mould has dried it is ready to use, small pieces of clay are being pushed into the bug shapes. |
 |
| Bugs & frogs just de-moulded, we decided to leave them on the clay rather than cutting them out as the legs would be too fragile, they thought they looked like fossilised bugs. |
 |
| The bugs at bone dry stage ready for firing and then glazing. (will post images after they have been fired) |
The bugs after a bisque firing, they can now be glazed or painted with other paints,varnishes or finishes you choose.
|
| Other hand formed bugs and kids creations at bone dry stage. |
 |
If you don't have access to a kiln, this can be done just as well with air drying clay or other modelling compound and painted with poster colours when dry.Enjoy yourselves!! |
 |
| Some of the vessels just after being made, they have added handles and lids to some of them. |
 |
| Drying out in the workshop |
 |
| After a bisque firing (even those skinny handles survived!) |
 |
| Set out to be photographed before packing in newspaper to go back to school. |


Make sure to read on up until the Conclusion of this article in order to be able to learn the most about folding furniture for small spaces. We have also included a video in order to give you further information on the topic of small space folding table and chairs. Moreover, if you’re interested in some Wall-mounted DIYs, do check out our guide on what is the best wall mounted fold down table? https://wallmountedhub.com/folding-wall-tables-for-small-spaces/
ReplyDeleteThe art and craft supplies from Bobangles offer endless creative possibilities for kids. Using these high-quality materials, children can develop fine motor skills while crafting unique designs. These Art and Craft Supplies inspire fashion sense by encouraging kids to create wearable art like handmade jewelry or personalized accessories. From vibrant paints to sculpting clay, the collection helps kids express their creativity and build confidence in their artistic abilities. Perfect for various DIY projects, these supplies ensure hours of fun and learning.
ReplyDelete